Tag Archives: shipping

Shipping Art

Bad example of packaging on so many levels

Occasionally I get asked if I ship my work, which is a common question among artists and non-artists alike.  The thought of packaging an original work of art and handing it over to a carrier is scary.  I will admit that it makes me anxious.  However, after reviewing the methods of other shipping companies, as well as researching the internet, I have been successfully packaging my own work for transit for many years now.  I have to say that this was not only a financial decision, but also based on a bad experience in which one of my paintings was damaged by a shipping company.  So here are the steps I follow when shipping my paintings:

– Wrap the front and sides of the canvas with glassine paper.  This can be found online at just about any art supply shop.  Be sure to tape the paper to the back, not the front of the canvas.

– Then wrap the painting front and sides with a sheet of mylar.  I like Grafix Dura-Lar which you can find on Utrecht.com.  This helps protect against moisture due to climate/temperature change.

– Bubble wrap the painting with large bubble wrap, covering the back as well.  I like to then wrap it again with another sheet of bubble wrap.  Try to limit the tape to just along the sides to help prevent someone from cutting into the painting when removing tape.

– Prep your box for transit. I like the ones offered by U-Line (uline.com) since they have boxes specifically for artwork.  I suggest getting one that leaves a minimum 3 inches of space around your painting.

– Tape one end of the box together with clear packing tape, covering it horizontally and vertically as well as along the seams of the box and corners.

– While the box is empty, I like to mark it with a permanent marker, writing “Fragile” on all sides of the box and I put an “up” arrow along where the top is.  Also, it helps the gallery if you write your name (I just use my last name since it’s unique enough) on the box as well.  Just be sure that it is away from the “Fragile” signs to help with visibility.

– Before stuffing the box, I use a few extra sheets of cardboard to protect the body of the box and the painting.  I like to have 2 sheets on either side of the painting, but if it’s really thick you can use one on each side.  The cardboard should be cut to cover the painting but be just smaller than the inside of the box to ensure a good fit.

– When shipping a larger painting, I like to use a couple of sheets of thin wood such as luan, which I get at Home Depot.  I will also add a couple of sheets of cardboard as well, if space allows.

– Line the bottom of your box with crumpled brown kraft paper or tissue paper.  I advise against colored tissue paper or newspaper in case of bleeding.  Pack the bottom well, especially the corners of the box.

– Place the wrapped painting in the box, between the sheets of cardboard so there are even amounts on each side.  If using luan, place the painting between the luan, leaving extra cardboard evenly on each side.

– Line the sides of the box with more kraft paper or tissue paper.  If the box is large, you may need a dowel or broomstick to help push the paper down the sides to ensure they are properly stuffed.

– Finish with kraft paper or tissue across the top of the painting.  If including a gallery contract or other paperwork, I put that information in a 9×12 envelope and place it across the top of the painting before adding kraft paper.  Then seal with clear packing tape, again going horizontally and vertically.

In cases where the work will be shipped back to me, I like to include a typed packing instruction sheet for the gallerist.  Make sure your name, contact info, and the name of your painting is on the sheet as well.  This way you can ensure that your painting is packaged in the same manner as it was received.

Also, I won’t promote any one carrier, but I will say that I prefer 2-day Air shipping.  It can be expensive depending on the size of the piece, but it goes through the least number of hands.  (Other than overnight, which is $$.)

————

www.AmyGuidry.com

Get the latest on new works via my monthly newsletter: www.amyguidry.com/contact.html

Follow me on Facebook: www.facebook.com/pages/Amy-Guidry/51953219932

Recycling at its best

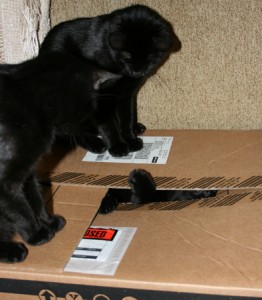
Recycled shipping boxes and cardboard = awesome cat scratcher

One thing people may not realize is that as an artist, I have to keep a LARGE supply of packing materials on hand.  Much of it consists of boxes and tissue paper or kraft paper, so I recycle whatever I can.  For instance, tissue paper that ends up in return shipments can be used again in other shipments or I use it when wrapping gifts.  Thanks to Design Sponge, I found a great use for corrugated cardboard- DIY cat scratchers!  This is actually a photo of the first one I made modeled by Tiny, the cat.  Warning: this project will give your Carpal Tunnel a workout, depending on the thickness of cardboard, so be sure to take many breaks.  Cute results, though.

————

www.AmyGuidry.com

Sign up for my monthly newsletter at: www.amyguidry.com/contact.html

Follow me on Facebook: www.facebook.com/pages/Amy-Guidry/51953219932

Art in Transit

Bad example of packaging on so many levels

Occasionally I get asked if I ship my work, which is a common question among artists and non-artists alike. The thought of packaging an original work of art and handing it over to a carrier is scary. I will admit that it makes me anxious. However, after reviewing the methods of other shipping companies, as well as researching the internet, I have been successfully packaging my own work for transit for a few years now. I have to say that this was not only a financial decision, but also based on a bad experience in which one of my paintings was damaged by a shipping company. So here are the steps I follow when shipping my paintings:

– Wrap the front and sides of the canvas with glassine paper. This can be found online at just about any art supply shop. Be sure to tape the paper to the back, not the front of the canvas.

– Then wrap the painting front and sides with a sheet of mylar. I like Grafix Dura-Lar which you can find on Utrecht.com. This helps protect against moisture due to climate/temperature change.

– Bubble wrap the painting with large bubble wrap, covering the back as well. I like to then wrap it again with another sheet of bubble wrap. Try to limit the tape to just along the sides to help prevent someone from cutting into the painting when removing tape.

– Prep your box for transit. I like the ones offered by U-Line (uline.com) since they have boxes specifically for artwork. I suggest getting one that leaves a minimum 3 inches of space around your painting.

– Tape one end of the box together with clear packing tape, covering it horizontally and vertically as well as along the seams of the box and corners.

– While the box is empty, I like to mark it with a permanent marker, writing “Fragile” on all sides of the box and I put an “up” arrow along where the top is. Also, it helps the gallery if you write your name (I just use my last name since it’s unique enough) on the box as well. Just be sure that it is away from the “Fragile” signs to help with visibility.

– Before stuffing the box, I use a few extra sheets of cardboard to protect the “body” of the box and the painting. I like to have 2 sheets on either side of the painting, but if it’s really thick you can use one on each side. The cardboard should be cut to cover the painting but be just smaller than the inside of the box to ensure a good fit.

– When shipping a larger painting, I like to use a couple of sheets of thin wood such as luan, which I get at Home Depot. I will also add a couple of sheets of cardboard as well, if space allows.

– Line the bottom of your box with crumpled brown kraft paper or tissue paper. I advise against colored tissue paper or newspaper in case of bleeding. Magazine pages are okay, but don’t look as “professional” so maybe consider where this is going first. Pack the bottom well, especially the corners of the box.

– Place the wrapped painting in the box, between the sheets of cardboard so there are even amounts on each side. If using luan, place the painting between the luan, leaving extra cardboard evenly on each side.

– Line the sides of the box with more kraft paper or tissue paper. If the box is large, you may need a dowel or broomstick to help push the paper down the sides to ensure they are properly stuffed.

– Finish with kraft paper or tissue across the top of the painting. If including a gallery contract or other paperwork, I put that information in a 9×12 envelope and place it across the top of the painting before adding kraft paper. Then seal with clear packing tape, again going horizontally and vertically.

In cases where the work will be shipped back to me, I like to include a typed packing instruction sheet for the gallerist. Make sure your name, contact info, and the name of your painting is on the sheet as well. This way you can ensure that your painting is packaged in the same manner as it was received.

Also, I won’t promote any one carrier, but I will say that I prefer 2-day Air shipping. It can be expensive depending on the size of the piece, but it goes through the least number of hands. (Other than overnight, which is $$.)